Welcome to NorthEast Alliance for Telecommunications, Serving Northeast Minnesota |
|
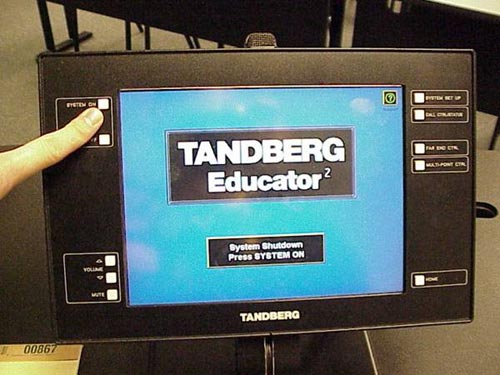
How To: Use an ITV room with a 6000/TAMSetting up the ITV equipment for use The Tandberg touch screen monitor that is usually located in the front of the room.
If the system is off, press ‘System On’ which is located on the left side of the touch screen. Note: Also make sure TVs are ‘ON’.
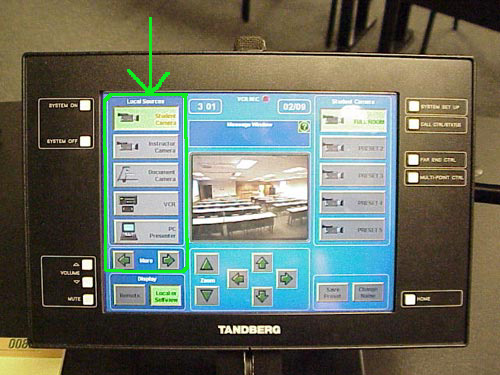
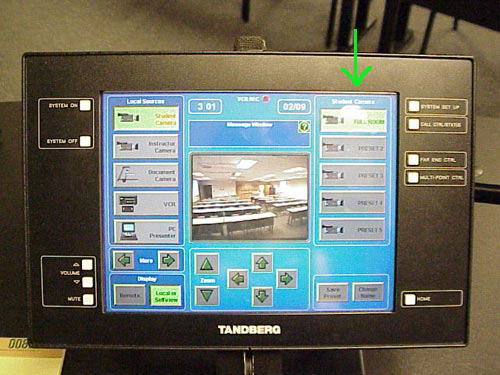
Once you have done that you will see ‘Touch to Start’ on the touch screen. You will need to push that to get the controls up on the touch screen. In the upper left of the touch screen you should see the ‘Local Sources’ section. These are the choices you have for the video displays you wish to show to the remote site and also what you wish to show on your local display. The choices are described below.
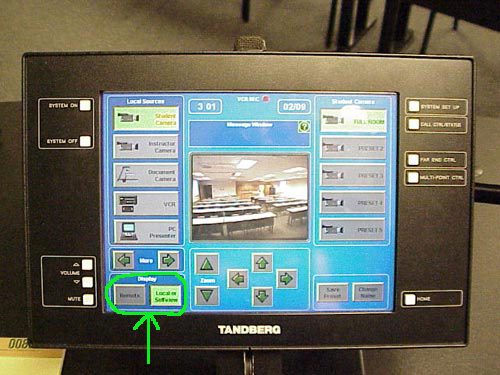
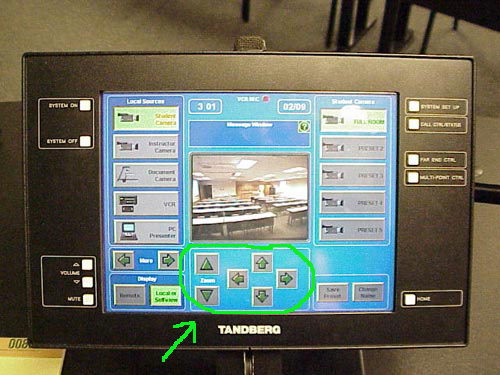
In the lower left of the touch screen, you will see the ‘Display’ section. The choices here are ‘ Remote’ and ‘ Local or Self view’. These two buttons will change what video you see on the touch screen from either local video source view to remote site view. You can also change the remote TV to local by pressing self view when in a call, not that you would want to but if you do you would have to press it again to undo. A note on the current display on the touch screen: if you press the picture in the center of the touch screen it will go to full screen. You will lose all buttons until you press the screen again and then press ‘Exit’ on the lower left.
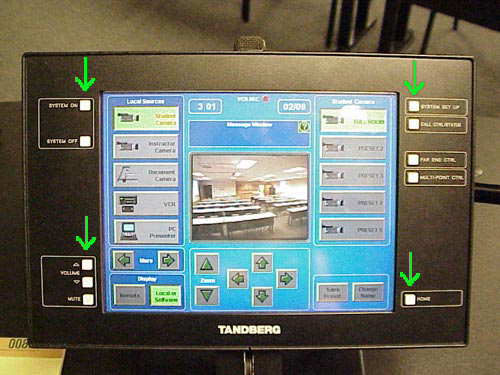
The buttons around the touch screen are:
In the bottom center of the touch screen you will see controls for currently selected Local Source if that source can be controlled from the touch screen. For the cameras it is basic pan, tilt, and zoom functions. In the right of the touch screen is for camera presets when a camera is selected. To preset a camera position press ‘Save Preset’ then press the preset number you wish to save it to. You can also rename it by pressing ‘Change Name’. When VCR is selected it is recording options, which are:
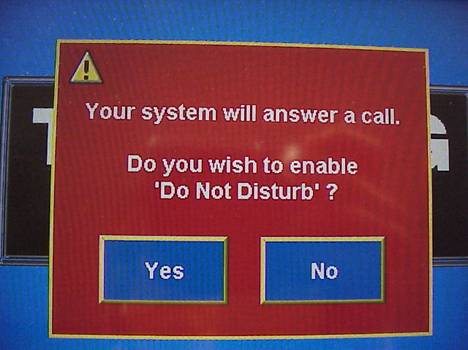
When you are done using the system you need to press ‘System Off’. You will be given a choice of ‘Do Not Disturb’ Yes or No. CHOOSE NO |
|